Tuesday, May 29, 2012

Checklist for summer


This has been on my "summer" to do list for the last couple summers but I haven't ever tried it.  THis year its happening!  Homemade Frozen Yogurt Pops.  There are so many yummy and different blends out their that my mouth waters everytime I see a picture of one.  Do you have any favorite Recipies?

Saturday, May 26, 2012

Winner!!!

Congrats Girl Next Door (Becca) you won my scraps!!!!

Thanks!
Tricia
Sent from my iPod

Wednesday, May 23, 2012

Giveaway!!

I have some great fabric scraps I would love to give you.
Like my fb page and be a blog follower to qualify. Leave a comment in this post leaving your email address and tell me you have done the above. Thanks! Giveaway closes friday!!

T-Mobile. America's First Nationwide 4G Network.

Monday, May 21, 2012

Monogrammed Blanket

This has been one of my favorites so far.  This is such a great easy project for beginners as well.  This is a great idea for a shower gift for sewers of all levels.  It is a great way to make things unique and personal.
I had a ton of this blue flannel.  The thought came to me this past week as Grey has been getting his way out of his swaddles.  I have been using the stretchy jersy blankets to swaddle him.  He just stretches and sretches his arms til he gets them out.  Then it wakes him up or he pulls his binky out or whatever.  Then that means I have to get up at night to fix the issue.  So I decided to make him a swaddling blanket.  But personalize it.  Of course with the color grey.  I promise I didn't name him after my favorite color.  It really was a coinsidence.  So here we go.

Materials:
Sewable Heat n Bond
scraps of material for lettering.  I used an extra jersy knit sheet cause it wont fray.  Makes the lettering part easier.
Flanel fabric cut 30x30 inches or so.  Big enough for swaddling  Or if you just want it as a floor blanket...whatever you want to do.
sewing machine and thread

Print lettering from your computer

cut it out to use as stencils, or if you have a real good hand, eyebal and draw the letters on the Heat n Bond

cut the heat n bond to fit the fabric.  Iron it to the wrong side of the fabric.  Then trace or draw your letters backwards on to the heat n bond paper.


cut out your letters, remove the paper and iron them to the fabric/blanket.


stitch around ech letter to secure in place.  Especially so because you don't want Baby to peel of the letters...choking hazard.


now I have a serger, so this next step was my final.  I just serged around the edges.  Other options might be bias tape binding, or folding over the edges and making a hem all around the blanket.  I chose of course the easiest and fastest way.

Ijust couldn't wait to take these pictures of Grey with his blanket.  I love this kid.  I have had so much fun training my brain to do boy projects for a change.  More projects to come this week!!! 

Enjoy!!

Saturday, May 19, 2012

Cucumber Salad

One of my absolute favorite salads for the summer time.  I grew up sitting outside on my wood back porch eating my cucumber salad along with my mom's awesome sloppy joes and homemade potatoe salad.  Doesn't that sound so good?  Also I remember picking the cucumbers and onions from my grandparent's garden and washing them clean so they could be prepared for this treat.  I can feel the heat from the sun melting my sunburned cheeks as I sit on the back patio on Malad, ID.  Always enjoying yummy food from the best garden ever.

Now you may have already tried this but let me just remind you how wonderful this is.  I like the long hot House Cucumbers, they are a little more expensive, but worth it.  They come individually wrapped in plastic wrap.  Partially peel them, and slice.  Add Red onion or Sweet Onion, a little pepper.

Now for vinegar you can try different ones.  Balsamic, Seasioned Rice Vinegar, Apple Cider Vinegar, or regular WHite Vinegar with a little water added.  Mix it up and let it sit for about 30 minutes before serving.  This allows the flavors to really melt together and seap into the pores of the vegis.  Sometimes I even add a few grape tomatoes and Feta Cheese.  You can get all kinds of creative with this salad.  SOoo good with grilled kabobs.  Yummy!!

Thursday, May 17, 2012

Basic Skirt and Pocket Tutorial

Need a quick fix?  Here it is.  Easy but cute.  So easy you might find yourself making a bunch right in a row.  I made a couple for birthday gifts.  It was fun, simple, different and sweet.  If you are new to sewing, here is your first project!!  This is also a great way to go through some fabric that you need to get through before you can get more...(i have a lot of that)


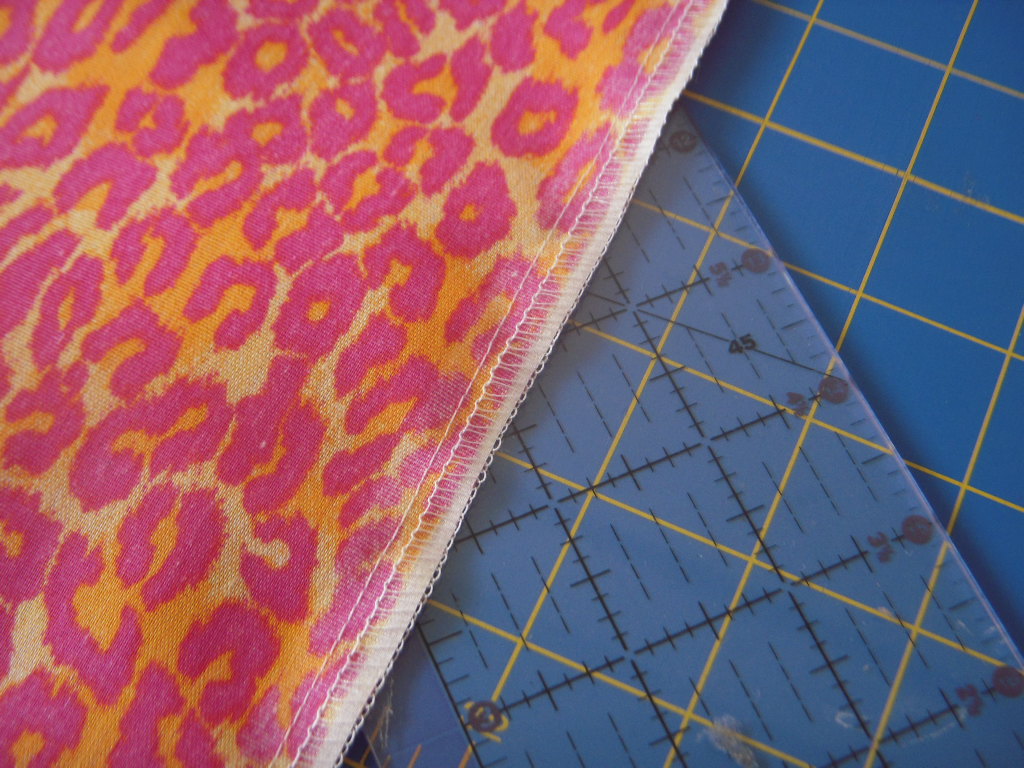
Your going to cut a basic rectangle.  This is for a cute 4 year old girl.  I measured 30 inches wide, by 14 inches long.  This hits right around the knee once hemmed.  With the right sides together, fold the skirt in half so the 14 inch edges meet, sew them together.


Iron/press that seam so it lays nice and flat.


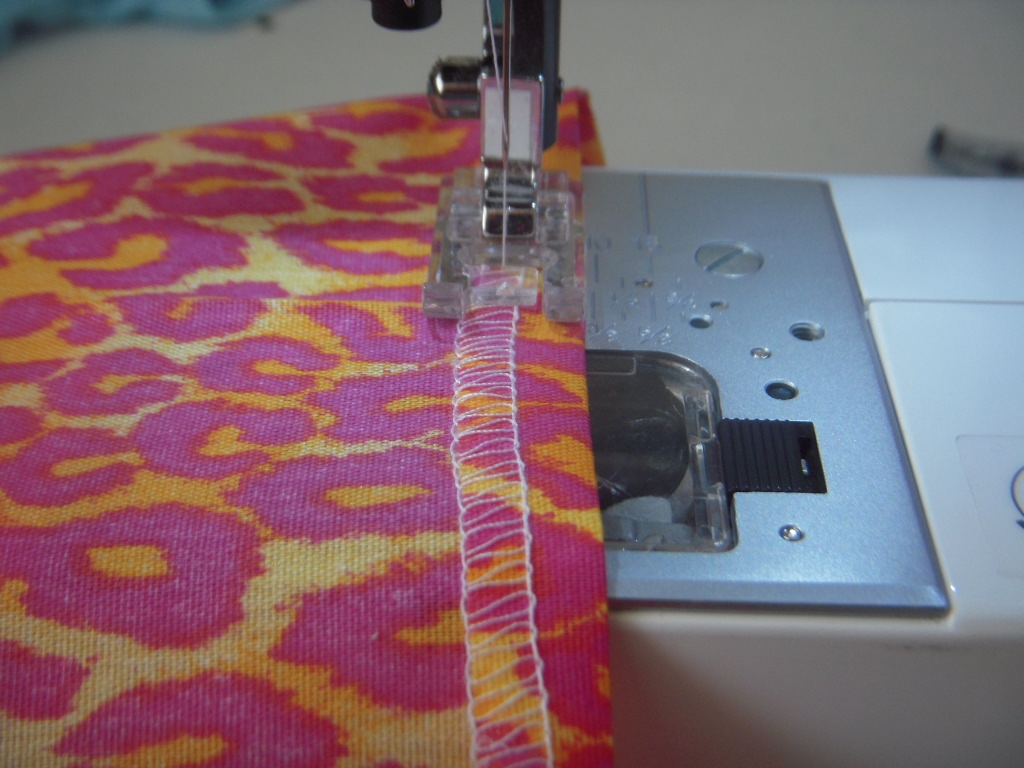
next you will make your elastic casing.  you can do 2 ways.  If you have a serger, or you want to use your Overcasting foot, or do a zig zag along the edge go ahead and do so.  Then fold and iron.  I used 3/4 inch elastic so I made my casing fold 1 inch.  If you don't have a serger, overcasting foot, or you don't want to zig zag around the edge, you can fold and press a 1/4 inch, then fold your other inch and press.  Sew your casing leaving about an inch opening for insterting the elastic.

next do your bottom hem using the same techniques as the casing, but just make a half inch hem.  Then sew.  If you want to make it really nice do a double needle stitch, or if you don't have a double needle, then just sew right next to your first hem.

Pockets.  This is a fun easy thing to add spice to any peice.  This is a basic pocket to introduce you into the world of pockets and all the styles.  Cut two pockets a little larger than you want. 

serge or fold down the top, then fold again and press and stitch about 1 inch.


Now fold and press 1/4 inch all the way around the pocket.  This is going to be probably the toughest part, but its not hard.  Its just going to make some creases and little pleats since you are working with rounded corners, but just know that it doesn't matter.   Just as long as you follow the shape of the pocket.

Then once pressed, place pocket right side out on your skirt and pin, making sure all those pressed edges stay on the underside.


Now top stitch along the pocket minus the opening (top).  Top stitch is as close to the edge.  And since you did a 1/4 inch fold under the pocket, you need to make sure you stay real close to the edge so those folds are sewn down to the skirt.

There they are, Not perfect, but still cute.  I don't do too many pockets, but I am gonna make them my new "thing"  :0)

Insert your elastic

overlap by an inch and zig zag stitch a couple times and reinforce it well.  Then sew your opening shut.  There you have it!!


Tuesday, May 8, 2012

Things To See

We have to enjoy as many midday walks as we can before the AZ sun starts to melt our shoes to the pavement.  Our walks consists mostly of exploring and chasing rabbits and lizards.  But today there were also so many flowers everywhere. They are always there but today I noticed them more.  Maybe my new thought process of enjoy each day with my children has influenced it.  Either way, today im happy.

T-Mobile. America's First Nationwide 4G Network.