

Another thing crossed off my handmade Christmas list for the girls. Allisandria keeps steeling my oven mit for her kitchen. she has a hot pad and her own towels, but she always wants MY oven mitt. So Dave gave me the bright idea to make the girls each their own. Fantastic! He really does have good ideas! I just don't admit it as often as I should. But this one I will.

For the pattern I traced loosely around my hand. I figured once it is all sewn up it will shrink to the perfect size for my girls. I was right.

Now after you cut out your pattern cut two peices of fabric, then another two on white for the inside of the mitt. 4 peices all together.

cut 2 peices from batting and place it inbetween a patterned peice and a white peice. Right sides facing out.

Sew along the edge of teh entire mitt. repeat for the other mitt as well. Sew using a 1/4 in SA. As close to the edge as you can.


Now take the two mitt sides and put white sides together. pin it in place.

I made some bias tape using Dana's Tutorial HERE and pinned it to the mitt, but leaving the bottom .
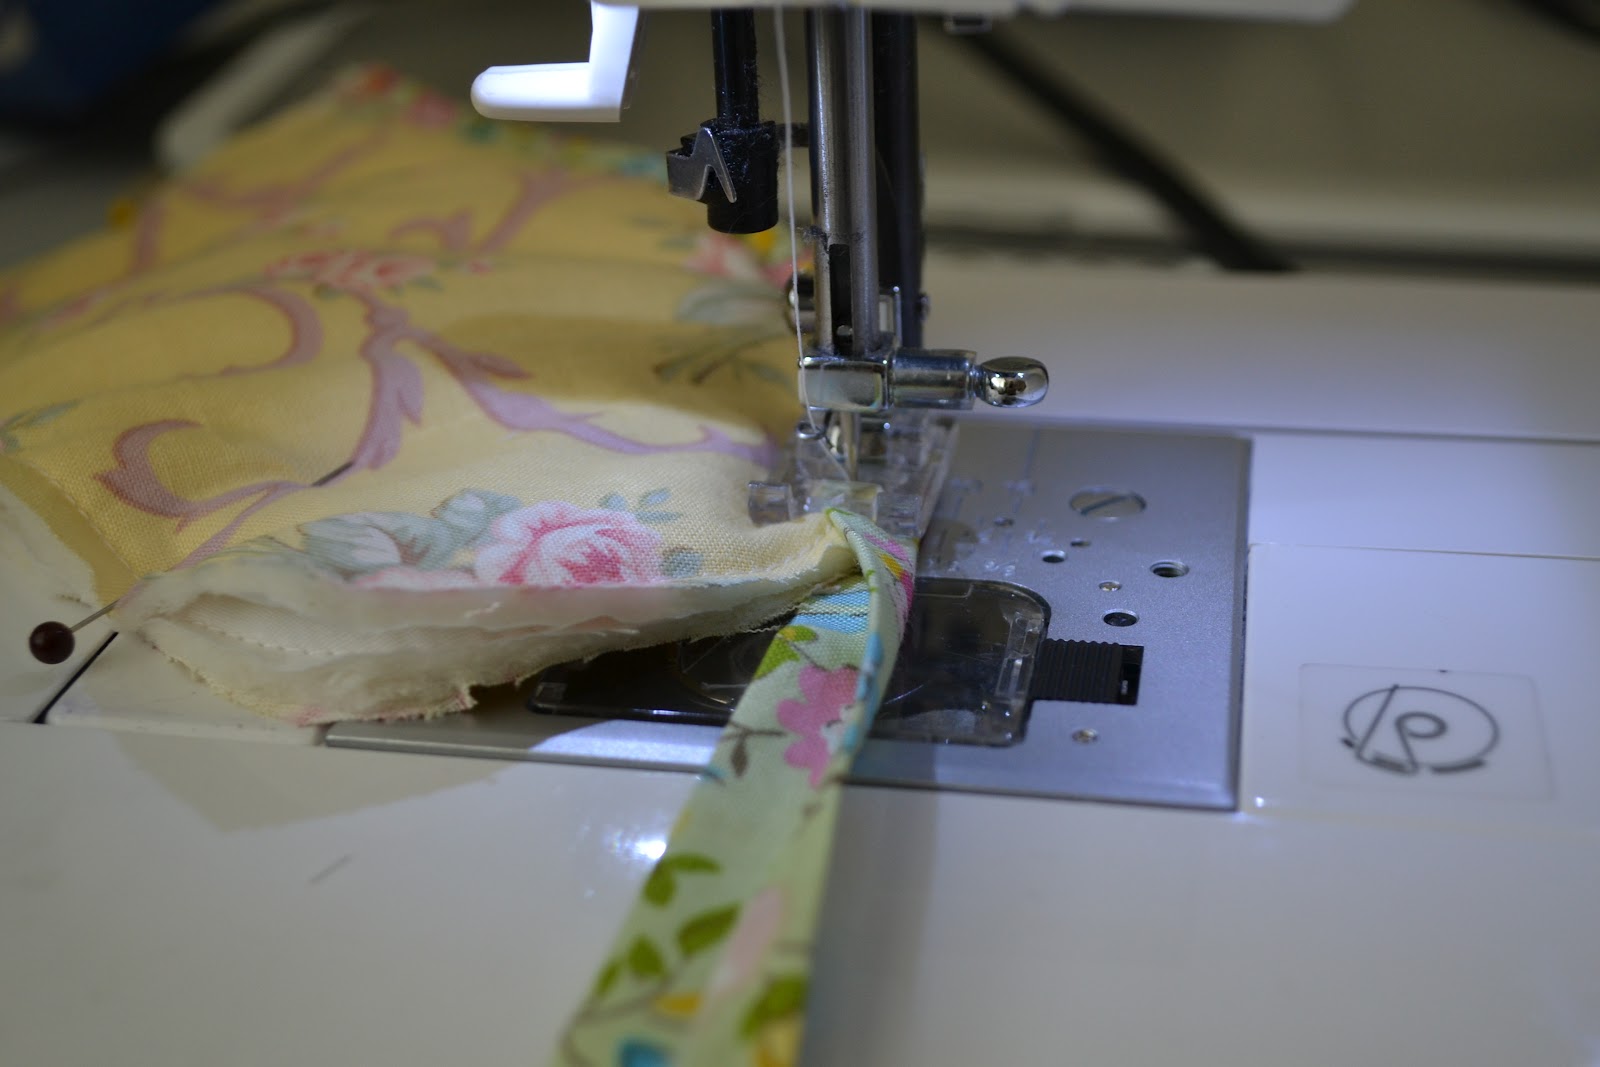
Carefully sew the bias tape on close to the edge as you can get assuring you are sewing it on the other side as well. This was tricky for me cause I don't use a lot of bias tape. especially the really small. I think mine is either 1/4 or 1/2 inch. really tiny.

When I got to the bottom (the opening of the mitt where you slide your hand in,) I sewed the tape one side at a time working in a circular motion.

when I got to the end of the mitt, I continued to stitch the bias tape close and trimmed it from the rest that I made.

I made a little hanging loop and stitched it to the mitt.


It worked out pretty well. The next one will probably be better on the bias tape. I am not very skilled on that technique yet. Oh well. The girls won't judge.
ENJOY!
No comments:
Post a Comment